


It may be intimidating to bake bread at home, but with a good recipe and some essential tips it can become a fun and easy experience. It doesn’t take professional baking skills or expensive equipment to make a warm and crusty loaf. This guide will walk you through a simple bread recipe, and give you useful tips so that your bread is always perfect.
Why bake bread at home?
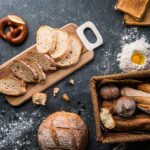
There are several advantages to homemade bread over the store-bought variety. You can control the ingredients, as there are no additives or preservatives. It tastes better and fresher. Baking bread is a rewarding and relaxing experience. It fills your home with delicious aromas and leaves you feeling accomplished.
Simple Bread Recipe
This recipe for basic bread is ideal for beginners. This recipe uses ingredients you probably already have in the kitchen.
Ingredients
- All-purpose flour or bread flour, 3 1/2 cups
- Salt: 1 1/2 teaspoons
- 1 teaspoon of sugar (optional, for a sweeter touch)
- Active dry yeast, 2 1/4 teaspoons (1 package)
- 1 1/4 cups warm water (110degF, or 45degC).
- Use 2 tablespoons of olive or melted butter
Step-by-Step Instructions
Step 1. Activate the yeast
Dissolve the sugar in water warm. Add the yeast, and let it rest for 5-10 mins until it is foamy. This ensures that the yeast is active and ready to assist your dough in rising.
Step 2: Mixing the dough
Combine the flour with salt in a large bowl. Add the olive oil and yeast mixture. Use a spoon to stir or your hands until you see the dough coming together. Add a tablespoon of flour at a time if the dough is too sticky. If the dough is too dry, you can add some water.
Step 3: Kneading the dough
The dough should be kneaded for 8-10 minutes on a lightly-floured surface until it is smooth and elastic. You can also use a stand-mixer with a dough hook to knead the dough for 5-7 mins on medium speed. The gluten in the bread is developed by kneading properly.
Step 4 – First Rise
Cover the dough with a damp cloth or plastic wrap. It should be allowed to rise for 1 or 2 hours in a warm place, away from drafts.
Step 5: Shape The Dough
Punch the dough down once it has risen to remove air bubbles. Turn the dough onto a floured work surface and form it into a loaf. Place it in a oiled loaf pan, or form it into a circle and place it onto a baking sheet.
Step 6 – Second Rise
Cover it again and let the dough rise for 30 to 45 minutes or until it doubles in size.
Step 7: Make the bread
Pre-heat your oven to 375degF. Bake the bread until it is golden brown on top and sounds hollow when you tap the bottom.
Step 8: Cool down and enjoy
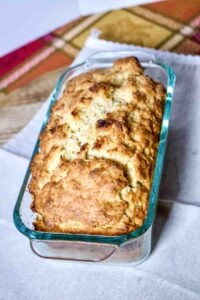
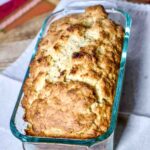
After removing the bread from oven, let it cool for 15 minutes on a wire rack before cutting. This will allow the structure to harden and make slicing much easier.
Tips for Successful Bread Baking
- Measure Accurately
It’s crucial to accurately measure all ingredients when baking bread. For the best results when measuring flour, use a kitchen scale. A dense bread can be made with too much flour, but a sticky bread can be created by using too little. - Check water temperature
Warm water is preferred, not hot. It can kill yeast if it is too hot. You want to aim for 110degF, which is 45degC. It should feel warm but not scorching. - When to bake the dough
The dough should be elastic and smooth when kneading. If the dough springs back when you press your finger into it, it is ready. - Let it Rise in a Warm Place
The yeast thrives when the temperature is warm. Place the dough in an oven near a warm stove or with the light only on if your kitchen is cold. - Check for Doneness
When the bread is just out of the oven, tap the bottom. It’s ready if it sounds hollow. Use a thermometer to check the temperature. It should be between 190 and 200degF.
Common Bread Problems and How to Fix Them
- Dense bread: This can be caused by adding too much or not enough flour. Be sure to thoroughly knead the dough and gradually add the flour.
- Flat bread: If you’re bread does not rise, it may be because the yeast was inactive. Check the expiration date of your yeast, and make sure it is activated properly.
- Too hard crust: Reduce oven temperature or cover the bread in foil during the last 10 minutes.
Why Practice Makes Perfect
Baking bread improves as you practice. You won’t learn anything new each time you bake. Don’t worry about your first loaf being perfect. After you have mastered the basic bread recipe, you can experiment with different flours and seeds, herbs and spices.
Making bread at home not only tastes great, but is also healthier than the store-bought variety. You can make bakery-quality bread in your kitchen by following this recipe. Enjoy the process and enjoy every slice.